Step 1: Create Database
- Goto RDS dashboard and click on Create Database
- Select Standard create for database creation method
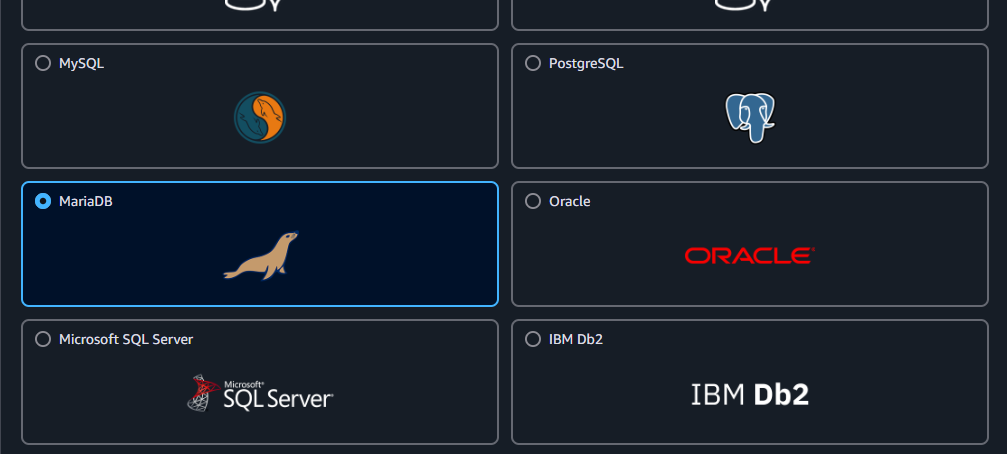
- I chose MariaDB engine
- Engine Version selected n-1 that is one step behind the latest one
- Select Free Tier Template
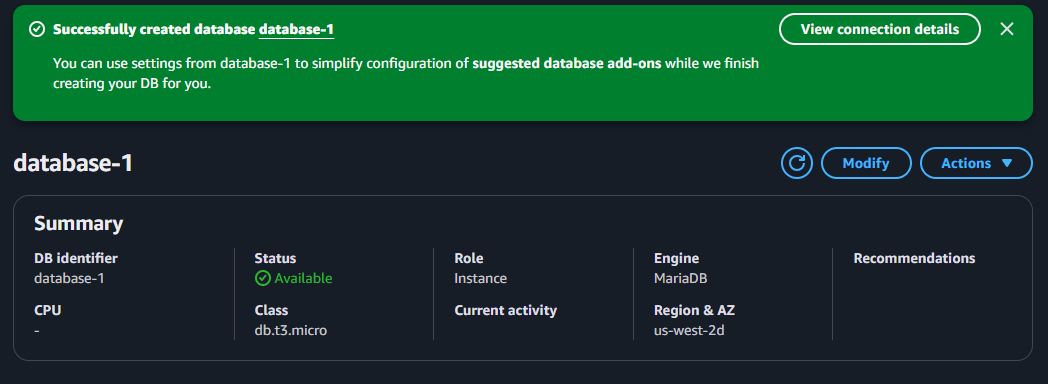
- I leave database-1 as DB instance identifier name
- Self Managed Credential Management
- and inputed desired Master Password i.e
Passw0rd123 - In instance configuration I selected Burstable classes for DB instance class
- and selected db.t3.micro
- for storage I selected General Purpose SSD gp2 and allocated 20GB of storage
- I left default setting as it is and clicked on Create Database
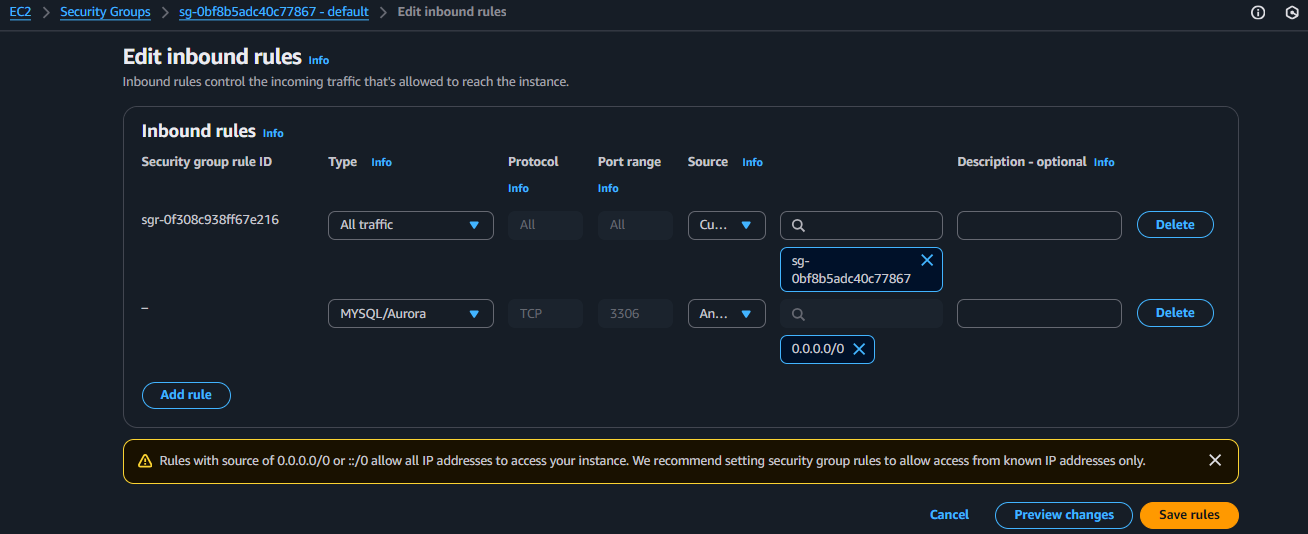
 Also add security group rules for port 3306 for database
Step 2: Configure Instance for Mariadb

- Launch ec2 instance
- I gave name of ec2 instance db-test
- Selected Amazon linux free tier
- and added security group for 3306 port [make sure to have same security group for both ec2 and rds]
- Clicked on create instance
- Log into instance
Step 3: Connect to RDS via ec2
- After login to ec2 install mariadb client
yum install mariadb105- Login to endpoint of RDS we just created
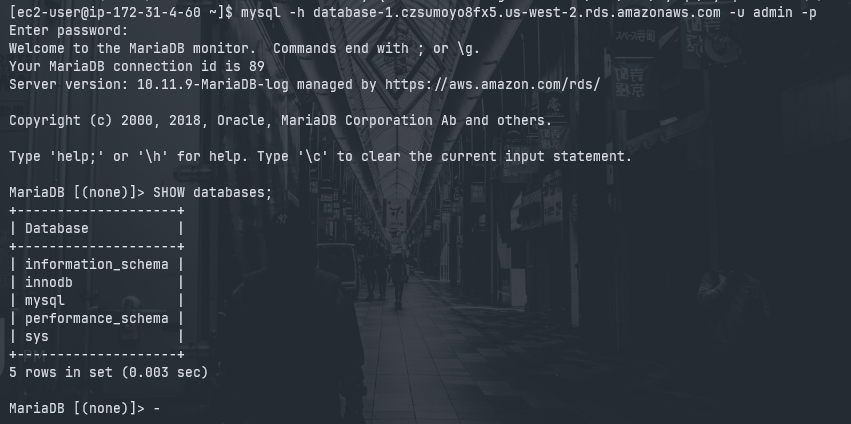
mysql -h <hostname> -u <user> -p
mysql -h database-1.czsumoyo8fx5.us-west-2.rds.amazonaws.com -u admin -p
Input the password and congrats you just logged into your fresh sql database.
Reference:
Create User (Optional)
CREATE USER 'sammy'@'localhost' IDENTIFIED BY 'password';
grant create, alter, drop, insert, update, delete, select on demo.persons to 'sammy'@'localhost';
grant select on demo.* to 'sammy'@'localhost';
show grants for 'sammy'@'localhost';
Install packages
Install tomcat, git, maven
Install tomcat from source
Install this specific version from source
curl -O https://dlcdn.apache.org/tomcat/tomcat-9/v9.0.97/bin/apache-tomcat-9.0.97.zip
unzip apache-tomcat-9.0.97.zip
yum install java-17 -y
cd apache-tomcat-9.0.97/bin/
bash ./catalina.sh start
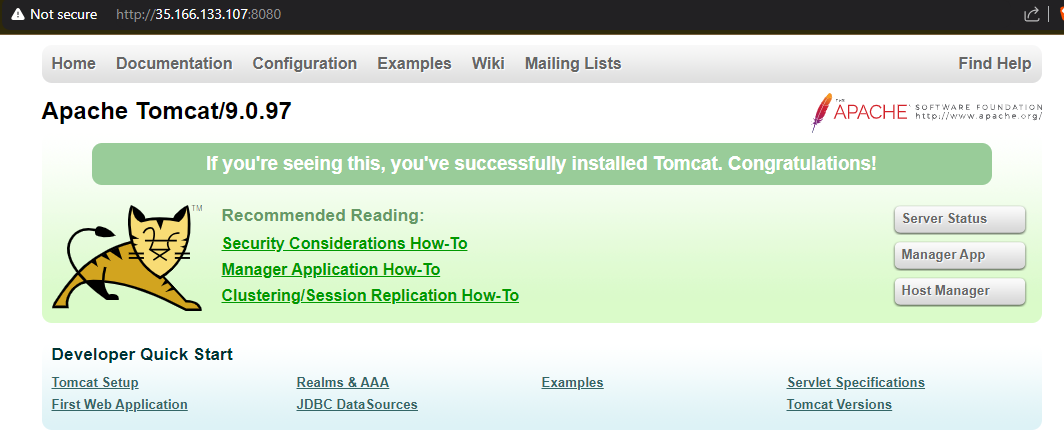
hit the instance ip:8080 / curl the ip
You should see tomcat webpage
Install git
sudo yum install git -y
Install maven
sudo yum install maven -y
Clone the webapp repo
git clone https://github.com/Pritam-Khergade/student-uibuild application
cd student-ui
mvn clean package
this must have created .war file in target folder rename it to suitable short name and move to apache-tomcat’s webapps directory
mv target/studentapp-2.2-SNAPSHOT.war target/studentapp.war
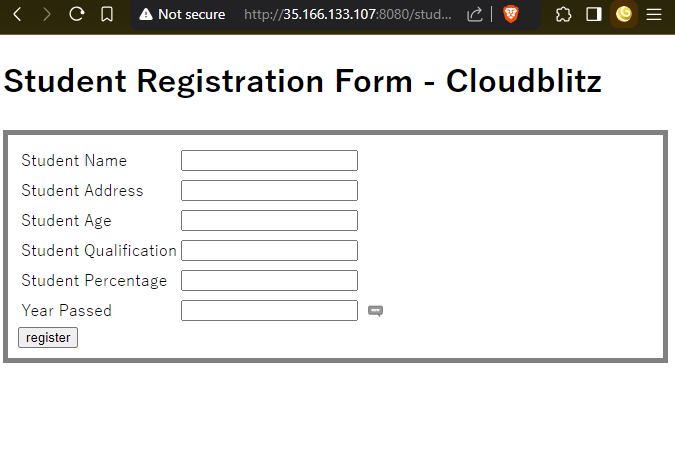
mv target/studentapp.war ../apache-tomcat-9.0.97/webapps/hit the instance ip:8080/studentapp
Upon filling the form if you get this
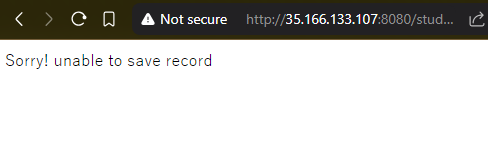 It means you have not connected RDS with this webapp
lets do this
It means you have not connected RDS with this webapp
lets do this
Login to mysql
mysql -h database-1.czsumoyo8fx5.us-west-2.rds.amazonaws.com -u admin -pcreate database with studentapp tables
CREATE DATABASE studentapp;
use studentapp;
CREATE TABLE if not exists students(student_id INT NOT NULL AUTO_INCREMENT,
	student_name VARCHAR(100) NOT NULL,
    student_addr VARCHAR(100) NOT NULL,
	student_age VARCHAR(3) NOT NULL,
	student_qual VARCHAR(20) NOT NULL,
	student_percent VARCHAR(10) NOT NULL,
	student_year_passed VARCHAR(10) NOT NULL,
	PRIMARY KEY (student_id)
);
show database;
use studentapp;
show tables;
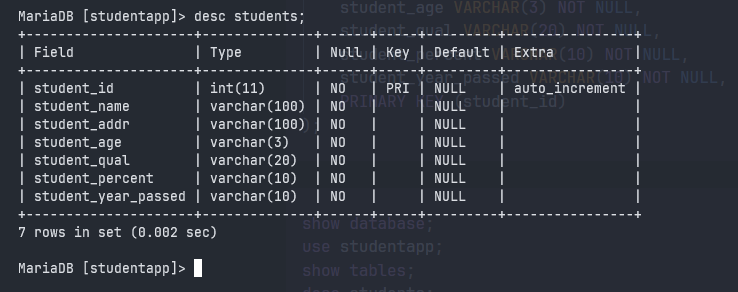
desc students;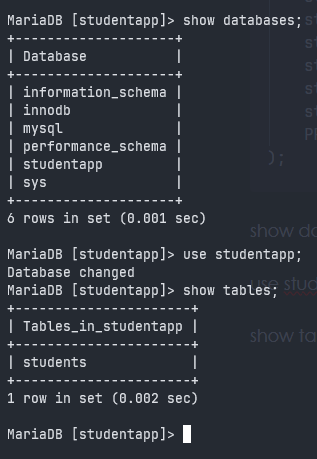
Ir should look like this
Configure tomcat to talk to RDS
goto conf folder in apache-tomcat source folder
cd ../conf
#and edit context.xml file
vi context.xml
and paste this code between <context></context> block
<Resource name="jdbc/TestDB" auth="Container" type="javax.sql.DataSource"
maxTotal="500" maxIdle="30" maxWaitMillis="1000"
username="admin" password="Passw0rd123" driverClassName="com.mysql.jdbc.Driver"
url="jdbc:mysql://database-1.czsumoyo8fx5.us-west-2.rds.amazonaws.com:3306/studentapp?useUnicode=yes&characterEncoding=utf8"/>make sure to edit username and password values with your own and url to your hostaname of database
Installing the mysql connector library file
copy this url - https://s3-us-west-2.amazonaws.com/studentapi-cit/mysql-connector.jar
Place the mysql connector library (mysql-connector.jar) into /lib folder of apache-tomcat directory by using curl or wget
cd ../lib
curl -O https://s3-us-west-2.amazonaws.com/studentapi-cit/mysql-connector.jar
now that library file is placed into its correct location lets restart catalina but first navigate back to bin directory where catalina.sh binary is located
cd ../bin
bash catalina.sh stop
bash catalina.sh start
Now navigate to browser with this url ec2-instance-ip:8080/studentapp
now registration data should be able to passed into database
After the filling the registration form login to mysql database and check if the data is present in the table now.
mysql -h <rds endpoint> -u admin -p
show databases;
use studentapp;
show tables;
select * from students;